Three.js Angularの例:3Dアニメーションの理解と実装
本記事では、Three.jsとAngularを組み合わせて、インタラクティブな3Dアニメーションを作成する方法を解説します。初心者から中級者向けに、実際のコード例やプロジェクトのセットアップ手順を詳しく説明します。
Three.jsとは何か?
Three.js は、JavaScript を使って 3D グラフィックスやアニメーションを作成するための強力なライブラリです。Three.js を使うと、Web ブラウザ上でインタラクティブな 3D コンテンツを簡単に作成することができます。Three.js のコアとなる要素は、シーン、カメラ、レンダラーの 3 つです。
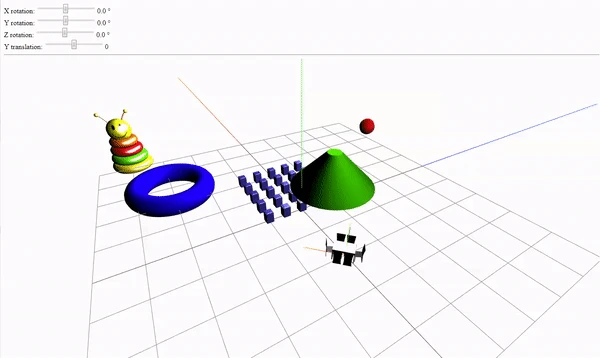
Three.js の可能性を示す例をいくつか紹介します。
AngularでのThree.jsの統合方法
AngularアプリケーションにThree.jsを統合するためのステップバイステップガイドを提供します。依存関係のインストールからコンポーネントの作成まで、具体的な手順を解説します。
ステップ1: 依存関係のインストール
AngularプロジェクトでThree.jsを使うためには、最初に必要な依存関係をインストールします。
npm install three --saveステップ2: Three.jsコンポーネントの作成
次に、Three.jsを処理するためのコンポーネントを作成します。以下は、簡単なシーンをセットアップするコード例です:
<script>
import { Component, OnInit } from '@angular/core';
import * as THREE from 'three';

@Component({
  selector: 'app-three-js',
  template: '<div id="scene"></div>',
  styles: ['#scene { width: 100%; height: 100vh; }']
})
export class ThreeJsComponent implements OnInit {
  ngOnInit() {
    this.initThree();
  }

  initThree() {
    const scene = new THREE.Scene();
    const camera = new THREE.PerspectiveCamera(75, window.innerWidth / window.innerHeight, 0.1, 1000);
    const renderer = new THREE.WebGLRenderer();
    renderer.setSize(window.innerWidth, window.innerHeight);
    document.getElementById('scene')?.appendChild(renderer.domElement);

    const geometry = new THREE.BoxGeometry();
    const material = new THREE.MeshBasicMaterial({ color: 0x00ff00 });
    const cube = new THREE.Mesh(geometry, material);
    scene.add(cube);

    camera.position.z = 5;

    const animate = () => {
      requestAnimationFrame(animate);
      cube.rotation.x += 0.01;
      cube.rotation.y += 0.01;
      renderer.render(scene, camera);
    };

    animate();
  }
}
</script>
実際の3Dアニメーションを作成する
Three.jsを使用して実際の3Dアニメーションを作成する方法について、詳細なコード例を交えて説明します。視覚的なエフェクトやインタラクションを加える方法も紹介します。
3Dオブジェクトの追加
3Dオブジェクトをシーンに追加して、より魅力的なビジュアルを作成します。以下はテクスチャを持つ球体の例です:
<script>
const textureLoader = new THREE.TextureLoader();
const sphereGeometry = new THREE.SphereGeometry(1, 32, 32);
const sphereMaterial = new THREE.MeshStandardMaterial({ map: textureLoader.load('path/to/texture.jpg') });
const sphere = new THREE.Mesh(sphereGeometry, sphereMaterial);
scene.add(sphere);
</script>
まとめ
この記事では、Three.jsとAngularを組み合わせて3Dアニメーションを作成する方法について学びました。この技術を使うことで、魅力的なインタラクティブな体験を提供することができます。
Canvas Box コンポーネントの生成とインポート
Angular CLI を使って、"canvas-box" という名前のコンポーネントを作成します。
ng generate component canvas-box
次に、app.module.ts ファイルに CanvasBoxComponent をインポートします。
import { BrowserModule } from '@angular/platform-browser';
import { NgModule } from '@angular/core';

import { AppComponent } from './app.component';
import { CanvasBoxComponent } from './canvas-box/canvas-box.component';

@NgModule({
  declarations: [
    AppComponent,
    CanvasBoxComponent
  ],
  imports: [
    BrowserModule
  ],
  providers: [],
  bootstrap: [AppComponent]
})
export class AppModule { }
Canvas Box の構造の実装と理解
canvas-box.component.html ファイルに、canvas 要素を作成し、ID を設定します。
<canvas #canvasBox></canvas>
canvas-box.component.ts ファイルに、createThreeJsBox() メソッドを作成し、ngOnInit ライフサイクルフックでこのメソッドを呼び出します。
import { Component, OnInit, ElementRef, ViewChild } from '@angular/core';
import * as THREE from 'three';

@Component({
  selector: 'app-canvas-box',
  templateUrl: './canvas-box.component.html',
  styleUrls: ['./canvas-box.component.css']
})
export class CanvasBoxComponent implements OnInit {
  @ViewChild('canvasBox') canvasBox: ElementRef;

  constructor() { }

  ngOnInit() {
    this.createThreeJsBox();
  }

  createThreeJsBox() {
    // Three.js のコードをここに記述
  }
}
注意: document.getElementById メソッドは、SSR (Server-Side Rendering) 環境では使用できません。SSR 環境で Three.js を使用する場合、canvas 要素への参照を取得する方法を工夫する必要があります。SSR 環境かどうかを確認するには、@nguniversal/express-engine などの Angular パッケージを使用することができます。
シーン、マテリアル、ライトの設定
canvas 要素を取得し、シーン、マテリアル、環境光、点光源を作成します。
createThreeJsBox() {
  const canvas = this.canvasBox.nativeElement;

  // シーンを作成
  const scene = new THREE.Scene();

  // マテリアルを作成
  const material = new THREE.MeshStandardMaterial({
    color: 0xff0000 // 赤色
  });

  // 環境光を作成
  const ambientLight = new THREE.AmbientLight(0xffffff, 0.5); // 白色、強度 0.5
  scene.add(ambientLight);

  // 点光源を作成
  const pointLight = new THREE.PointLight(0xffffff, 1); // 白色、強度 1
  pointLight.position.set(10, 10, 10);
  scene.add(pointLight);

  // ...
}
説明:
- シーン (Scene): 3D オブジェクトやライトなどを配置するためのコンテナです。
- マテリアル (Material): 3D オブジェクトの表面の見た目 (色、質感など) を定義します。
MeshStandardMaterialは、光沢のある表面を表現するためのマテリアルです。 - 環境光 (AmbientLight): シーン全体を均等に照らす光源です。影は作りません。
- 点光源 (PointLight): 特定の点から全方向に光を放つ光源です。影を作ることができます。
3D ジオメトリの追加
ボックスと円環のジオメトリを作成し、シーンに追加します。
createThreeJsBox() {
  // ... (シーン、マテリアル、ライトの設定)

  // ボックスジオメトリを作成
  const boxGeometry = new THREE.BoxGeometry(1, 1, 1); // 幅、高さ、奥行き

  // ボックスメッシュを作成
  const boxMesh = new THREE.Mesh(boxGeometry, material);
  scene.add(boxMesh);

  // 円環ジオメトリを作成
  const torusGeometry = new THREE.TorusGeometry(0.5, 0.2, 16, 100); // 内径、外径、ラジアルセグメント数、チューブセグメント数

  // 円環メッシュを作成
  const torusMesh = new THREE.Mesh(torusGeometry, material);
  torusMesh.position.x = 2; // x 軸方向に 2 だけ移動
  scene.add(torusMesh);

  // ...
}
説明:
- ジオメトリ (Geometry): 3D オブジェクトの形を定義します。
BoxGeometryはボックス、TorusGeometryは円環の形を表します。 - メッシュ (Mesh): ジオメトリとマテリアルを組み合わせた 3D オブジェクトです。シーンに追加することで、レンダリングされます。
カメラとレンダラーの設定
スクリーンサイズを設定し、カメラとレンダラーを作成します。
createThreeJsBox() {
  // ... (シーン、マテリアル、ライト、ジオメトリの設定)

  // スクリーンサイズ
  const sizes = {
    width: 800,
    height: 600
  };

  // カメラを作成
  const camera = new THREE.PerspectiveCamera(75, sizes.width / sizes.height, 0.1, 100); // 画角、アスペクト比、ニアクリップ面、ファークリップ面
  camera.position.z = 3; // z 軸方向に 3 だけ移動
  scene.add(camera);

  // レンダラーを作成
  const renderer = new THREE.WebGLRenderer({
    canvas: canvas
  });
  renderer.setSize(sizes.width, sizes.height); // レンダラーのサイズを設定

  // ...
}
説明:
- PerspectiveCamera: 遠近感のあるカメラです。画角、アスペクト比、ニアクリップ面、ファークリップ面を指定します。
- WebGLRenderer: WebGL を使ってシーンをレンダリングするレンダラーです。canvas 要素を指定します。
シーンのレスポンシブ化
ウィンドウサイズ変更イベントリスナーを追加し、canvas サイズ、カメラのアスペクト比、投影行列、レンダラーのサイズを更新します。
createThreeJsBox() {
  // ... (シーン、マテリアル、ライト、ジオメトリ、カメラ、レンダラーの設定)

  // ウィンドウサイズ変更イベントリスナー
  window.addEventListener('resize', () => {
    // canvas サイズを更新
    sizes.width = window.innerWidth;
    sizes.height = window.innerHeight;

    // カメラのアスペクト比を更新
    camera.aspect = sizes.width / sizes.height;
    camera.updateProjectionMatrix(); // 投影行列を更新

    // レンダラーのサイズを更新
    renderer.setSize(sizes.width, sizes.height);
  });

  // ...
}
説明:
ウィンドウサイズが変更されたときに、canvas サイズ、カメラのアスペクト比、レンダラーのサイズを更新することで、シーンがウィンドウサイズに合わせて適切に表示されるようにします。カメラの投影行列を更新することで、アスペクト比の変更が正しく反映されるようにします。
3D ジオメトリのアニメーション
THREE.Clock と getElapsedTime メソッドを使って時間を取得し、ジオメトリの回転プロパティを更新します。requestAnimationFrame メソッドを使ってアニメーションループを実装します。
createThreeJsBox() {
  // ... (シーン、マテリアル、ライト、ジオメトリ、カメラ、レンダラー、レスポンシブ化の設定)

  // 時間計測用
  const clock = new THREE.Clock();

  // アニメーションループ
  const tick = () => {
    // 経過時間
    const elapsedTime = clock.getElapsedTime();

    // ボックスを回転
    boxMesh.rotation.y = elapsedTime * 0.5; // 0.5 ラジアン/秒で回転

    // 円環を回転
    torusMesh.rotation.x = elapsedTime * 0.3;
    torusMesh.rotation.y = elapsedTime * 0.7;

    // シーンをレンダリング
    renderer.render(scene, camera);

    // 次のフレームをリクエスト
    window.requestAnimationFrame(tick);
  };

  tick(); // アニメーションループを開始
}
説明:
- THREE.Clock: 経過時間を計測するためのクラスです。
- getElapsedTime():
THREE.Clockが開始されてからの経過時間を秒単位で返します。 - requestAnimationFrame: ブラウザに次のアニメーションフレームをリクエストする関数です。アニメーションループを実装するために使用します。
このコードでは、tick 関数の中で、経過時間を使ってジオメトリの回転プロパティを更新し、シーンをレンダリングしています。window.requestAnimationFrame(tick) を呼び出すことで、次のアニメーションフレームで tick 関数が再び実行され、アニメーションループが継続されます。
参考文献
| タイトル | リンク |
|---|---|
| Three.js公式サイト | threejs.org |
| Angular公式サイト | angular.io |
Q&A
Q1: Three.jsを使うために特別な知識が必要ですか?
A1: 基本的なJavaScriptの知識があれば、Three.jsを使い始めることが可能です。
Q2: AngularとThree.jsの統合は難しいですか?
A2: この記事で紹介した手順に従えば、比較的簡単に統合できます。
Q3: 3Dアニメーションに必要なパフォーマンス要件は何ですか?
A3: ウェブブラウザの性能やデバイスによって異なりますが、一般にGPUがサポートされていることが推奨されます。
```