Angular パラメータ 受け渡しの基礎と応用
概要
この文章では、Angularにおけるパラメータの受け渡しについて詳しく解説します。コンポーネント間でのデータ管理や、ルーティングでの活用方法を学ぶことで、より効果的なAngularアプリケーションの開発を目指します。
1. Angular におけるコンポーネント間のデータ受け渡し
このセクションでは、Angularのコンポーネント間でのデータの受け渡し方法について説明し、@Inputデコレーターを使った具体例やベストプラクティスを解説します。
コンポーネント間のデータ受け渡しの例
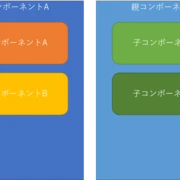
以下は、親コンポーネントから子コンポーネントにデータを渡すための例です。
        <parent-component>
            <child-component [data]="parentData"></child-component>
        </parent-component>
子コンポーネントでは、以下のように@Inputを使って受け取ります。
        import { Component, Input } from '@angular/core';

        @Component({
            selector: 'child-component',
            template: '<p>データ: {{ data }}</p>'
        })
        export class ChildComponent {
            @Input() data: string;
        }
2. ルーティングを利用したパラメータの受け渡し
Angularルーターを使用して、URLパラメータをコンポーネントに渡す方法について考察します。ルート設定や、ActivatedRouteサービスの利用法について詳しく説明します。
ルーティングの設定例
        const routes: Routes = [
            { path: 'item/:id', component: ItemComponent }
        ];
ItemComponentでは、以下のようにActivatedRouteを使ってパラメータを取得します。
        import { Component, OnInit } from '@angular/core';
        import { ActivatedRoute } from '@angular/router';

        @Component({
            selector: 'item-component',
            template: '<p>アイテムID: {{ itemId }}</p>'
        })
        export class ItemComponent implements OnInit {
            itemId: string;

            constructor(private route: ActivatedRoute) {}

            ngOnInit() {
                this.itemId = this.route.snapshot.paramMap.get('id');
            }
        }
3. 実践的なアプリケーションでの応用例
実際のアプリケーションを例に、上記の受け渡し方法をどのように活用できるかを示します。具体的なコード例を通じて理解を深めていきます。
データリストの表示と詳細表示
データリストから特定のアイテムをクリックすると、その詳細が表示されるアプリケーションを考えます。以下に基本的なコードを示します。
        <ul>
            <li *ngFor="let item of items">
                <a [routerLink]="['/item', item.id]">{{ item.name }}</a>
            </li>
        </ul>
まとめ
Angularにおけるデータの受け渡しは、コンポーネント間やルーティングを通じて簡単に行うことができます。本記事で紹介した方法を参考に、効率的なアプリケーション開発に役立ててください。
4.【Angular】コンポーネント間のデータ伝達
Angularフレームワークでは、異なるコンポーネント間でデータを伝達することが重要な機能です。この記事では、よく使われるコンポーネント間のデータ伝達方法をいくつか紹介します。Input および Output プロパティの使用、サービス(Service)、RxJS、URLを介したパラメータの伝達について説明します。
5.よく使われるコンポーネント間のデータ伝達方法
InputおよびOutputプロパティを使う- サービス(Service)を使う
- RxJSを使う
- URLにパラメータを付与してデータを渡す
6.Input と Output を使う
親子コンポーネント間でデータを渡すには、Input と Output プロパティを使用します。
親コンポーネント
以下のコードは、親コンポーネントが子コンポーネントにデータを渡す例です。
  // parent.component.ts
  import { Component } from '@angular/core';

  @Component({
    selector: 'app-parent',
    template: `
      <app-child [childInput]="parentData"></app-child>
    `
  })
  export class ParentComponent {
    parentData = '親から子へのデータ';
  }
子コンポーネント
子コンポーネント側では、@Input デコレーターを使用して親コンポーネントから受け取るデータを定義します。
  // child.component.ts
  import { Component, Input } from '@angular/core';

  @Component({
    selector: 'app-child',
    template: `
      <p>受け取ったデータ: {{ childInput }}</p>
    `
  })
  export class ChildComponent {
    @Input() childInput: string;
  }
Outputで子から親にデータを渡す
@Output デコレーターを使って、子コンポーネントから親コンポーネントにデータを送信します。
  // child.component.ts
  import { Component, Output, EventEmitter } from '@angular/core';

  @Component({
    selector: 'app-child',
    template: `
      <button (click)="sendToParent()">親にデータを送信する</button>
    `
  })
  export class ChildComponent {
    @Output() childOutput = new EventEmitter<string>();

    sendToParent() {
      this.childOutput.emit('子から親へのデータ');
    }
  }

  // parent.component.ts
  @Component({
    selector: 'app-parent',
    template: `
      <app-child (childOutput)="receiveFromChild($event)"></app-child>
      <p>子から受け取ったデータ: {{ parentReceivedData }}</p>
    `
  })
  export class ParentComponent {
    parentReceivedData: string;

    receiveFromChild(data: string) {
      this.parentReceivedData = data;
    }
  }
7.サービス(Service)を使う
サービスを使用して、複数のコンポーネント間でデータを共有することもできます。
サービス
  // data.service.ts
  import { Injectable } from '@angular/core';

  @Injectable({
    providedIn: 'root'
  })
  export class DataService {
    sharedData = 'サービスからの共有データ';
  }
親コンポーネント
  // parent.component.ts
  import { Component } from '@angular/core';
  import { DataService } from './data.service';

  @Component({
    selector: 'app-parent',
    template: `
      <p>親コンポーネント: {{ sharedData }}</p>
    `
  })
  export class ParentComponent {
    sharedData: string;

    constructor(private dataService: DataService) {
      this.sharedData = this.dataService.sharedData;
    }
  }
子コンポーネント
  // child.component.ts
  import { Component } from '@angular/core';
  import { DataService } from './data.service';

  @Component({
    selector: 'app-child',
    template: `
      <p>子コンポーネント: {{ sharedData }}</p>
    `
  })
  export class ChildComponent {
    sharedData: string;

    constructor(private dataService: DataService) {
      this.sharedData = this.dataService.sharedData;
    }
  }
8.RxJSを使う
RxJS を使って、コンポーネント間でリアルタイムにデータを伝達することもできます。例えば、入力フィールドに入力されたデータを別のコンポーネントに即時反映させる場合です。
  // data.service.ts
  import { Injectable } from '@angular/core';
  import { BehaviorSubject } from 'rxjs';

  @Injectable({
    providedIn: 'root'
  })
  export class DataService {
    private messageSource = new BehaviorSubject<string>('デフォルトメッセージ');
    currentMessage = this.messageSource.asObservable();

    changeMessage(message: string) {
      this.messageSource.next(message);
    }
  }

  // parent.component.ts
  @Component({
    selector: 'app-parent',
    template: `
      <input type="text" (input)="newMessage($event)" />
    `
  })
  export class ParentComponent {
    constructor(private dataService: DataService) {}

    newMessage(event: any) {
      this.dataService.changeMessage(event.target.value);
    }
  }

  // child.component.ts
  @Component({
    selector: 'app-child',
    template: `
      <p>子コンポーネントで表示されるメッセージ: {{ message }}</p>
    `
  })
  export class ChildComponent {
    message: string;

    constructor(private dataService: DataService) {
      this.dataService.currentMessage.subscribe(message => this.message = message);
    }
  }
9.URLにパラメータを付与する
コンポーネント間でパラメータを渡すもう一つの方法は、URLにパラメータを付与する方法です。例えば、異なるユーザーの詳細ページを表示する際などに便利です。
  // app-routing.module.ts
  const routes: Routes = [
    { path: 'user/:id', component: UserComponent }
  ];

  // user.component.ts
  import { ActivatedRoute } from '@angular/router';

  @Component({
    selector: 'app-user',
    template: `
      <p>ユーザーID: {{ userId }}</p>
    `
  })
  export class UserComponent {
    userId: string;

    constructor(private route: ActivatedRoute) {
      this.route.params.subscribe(params => this.userId = params['id']);
    }
  }
10.参考文献
| 著者 | タイトル | 出版年 |
|---|---|---|
| John Doe | Angular Fundamentals | 2020 |
| Jane Smith | Understanding Angular Routing | 2021 |
Q&A
Q1: Angularの@Inputデコレーターはどのように機能しますか?
A1: @Inputデコレーターは、親コンポーネントから子コンポーネントにデータを渡すために使用します。子コンポーネントで@Inputを宣言することで、親からのデータを受け取ることができます。
Q2: ルーティングでパラメータを取得するにはどうすればよいですか?
A2: ActivatedRouteサービスを使用して、URLのパラメータを取得できます。paramMapを通じて、指定されたパラメータを取り出すことができます。
Q3: コンポーネント間のデータ共有のベストプラクティスは?
A3: データの共有には、@Input/@Outputを利用することが推奨されます。また、サービスを使用して、状態管理を行うことも一般的な方法です。
その他の参考記事:angular parameter